Repair instructions
Tips and Tricks for Hitch Installation
When it comes to installing a tow hitch, choosing the right one is key to ensuring safe towing. A properly installed hitch will provide a reliable connection between your vehicle and trailer, but the process must be done with care and attention. Below, we’ll walk you through the essential steps of tow hitch installation, including preparation, tools, and safety precautions.
1. Select the Correct Tow Hitch for Your Vehicle
Before you start installing a hitch, make sure it’s the right one for your vehicle. Tow hitches come in various sizes, designed to handle specific loads. The hitch receiver size typically determines the type of ball mount you’ll use and the weight it can tow. Always check the Gross Vehicle Weight Rating (GVWR) of your vehicle to ensure the tow hitch can handle your trailer’s weight. Each hitch, as well as the ball mount, has its own weight limit. Make sure the combined weight of your trailer and cargo does not exceed these limits.
2. Gather All Necessary Tools
To ensure a smooth installation, you’ll need a specific set of tools. Here’s what you’ll need for the job:
- Rust penetrant (to help loosen any corroded parts)
- Wire brush (for cleaning mounting points)
- Safety glasses and gloves (for protection during installation)
- Ratchet & ratchet extension (for bolt installation)
- Torque wrench (to apply the correct tension to bolts)
- Shop light (to illuminate your work area)
Depending on your vehicle, you may also need:
- Jack & jack stands (if your vehicle’s ground clearance is low)
- Pry bar (for helping align parts)
- Tape measure and screwdriver (for alignment and assembly)
3. Familiarize Yourself with the Hitch’s Instructions
Before starting the installation, thoroughly read the instructions that come with your tow hitch. Understanding the exact steps, including how to locate mounting points and the torque specs for each bolt, will make the process much smoother. You can also find helpful instructional videos online.
4. Prepare the Work Area
If your vehicle sits low to the ground, using a jack and jack stands will raise it enough to give you sufficient clearance for hitch installation. A work light is also a must, as it will help you see under the vehicle, especially in tight or poorly lit spaces.
5. Clean the Mounting Points
Many vehicles already have pre-drilled holes for tow hitch installation, but they can become clogged with dirt, rust, or debris. Clean these holes with a wire brush and rust penetrant before attempting to install the bolts. Always wear safety glasses and gloves to protect yourself during this process. After cleaning, test the fit by screwing in the bolts by hand to ensure the holes are clear.
6. Drill the Frame (If Necessary)
In some cases, your vehicle may require additional drilling to accommodate the tow hitch. While many trucks and SUVs already have pre-threaded holes, some models may not. Use the hitch as a guide to mark where new holes need to be drilled. Begin with small pilot holes and gradually increase the drill bit size until you reach the correct size for the mounting bolts. Die grinders may be needed for larger holes or spacers. If drilling feels outside your comfort zone, it’s always a good idea to consult a professional.
7. Get Assistance with Positioning the Hitch
Tow hitches can be heavy, especially those designed for larger vehicles or heavy-duty towing. It’s often difficult to position the hitch alone. Consider having an extra set of hands to help lift and hold the hitch in place while you secure the bolts. One person can guide the hitch into place, while the other installs and hand-tightens the bolts.
8. Tighten the Bolts Using a Torque Wrench
Once the hitch is positioned and the bolts are hand-tightened, use a torque wrench to tighten them to the manufacturer’s specified torque. This is crucial, as over-tightening or under-tightening the bolts can result in damage or failure when towing. Make sure to follow the torque specifications carefully, as different bolts may require different torque settings.
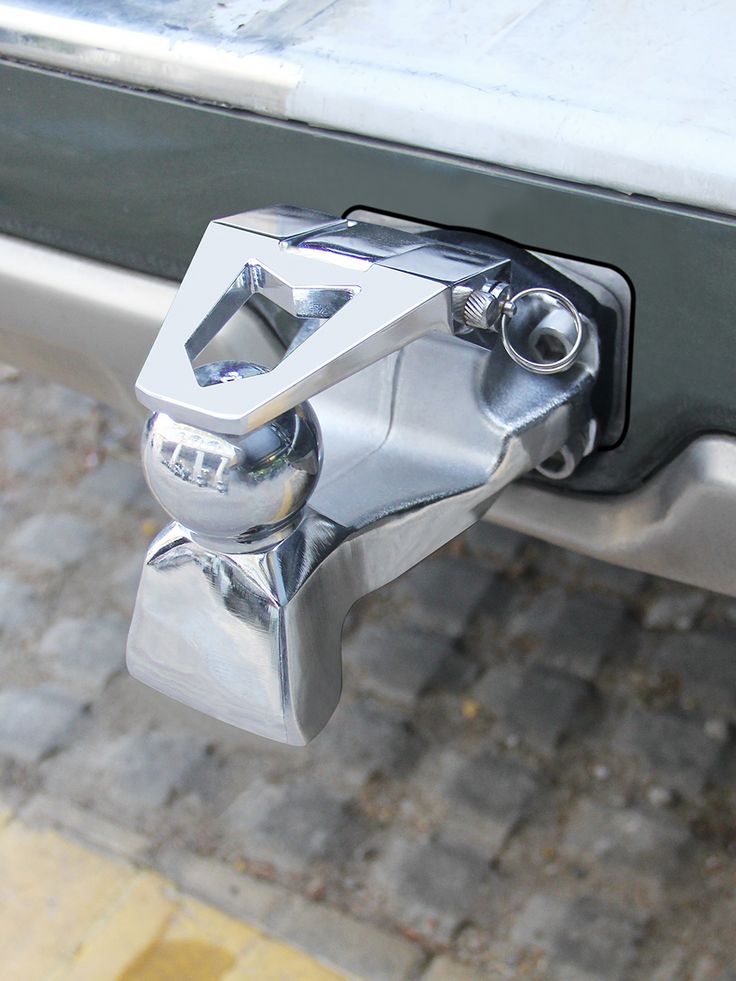
9. Install the Hitch Ball and Receiver
The final step is installing the hitch ball and securing it properly. Begin by inserting the threaded portion of the hitch ball through the receiver, then tighten the nut with two crescent wrenches—one to hold the ball in place, and the other to tighten the nut. Compress the lock washer as you tighten. Once secure, use a torque wrench to ensure the nut is tightened to the correct specifications.
With the hitch ball installed, slide the ball mount into the receiver and align the pinholes. Insert the pin and lock it in place with a retaining clip to complete the hitch installation.
Now your vehicle is ready to safely tow your trailer. Always double-check all connections and fasteners before towing, and regularly inspect your hitch for wear and damage.
Remember, if you’re uncomfortable with any part of the process or lack the necessary tools, it’s always best to seek help from a professional to ensure proper and safe installation.