Repair instructions
Tips for Changing a Blower Motor
Summary:
The blower motor in your vehicle plays a crucial role in the HVAC (Heating, Ventilation, and Air Conditioning) system by circulating air through the cabin. Whether you’re cooling off on a hot day or warming up during winter, the blower motor is responsible for moving air over the heater core or A/C evaporator, depending on your settings. If your blower motor stops working, it can lead to poor airflow or no air at all through the vents.
While some DIY enthusiasts may attempt a blower motor replacement, it’s best to leave this job to a qualified professional. A certified mechanic has the tools, expertise, and experience to safely and efficiently replace your blower motor, ensuring that your HVAC system operates properly once again.
Contents:
- What Is a Blower Motor?
- Blower Motor Replacement: Step-by-Step Process
- 2.1. Tools & Parts Required
- 2.2. Locating the Blower Motor
- 2.3. Preparing the Vehicle
- 2.4. Removing the Old Blower Motor
- 2.5. Installing the New Blower Motor
- 2.6. Reassembling the Vehicle
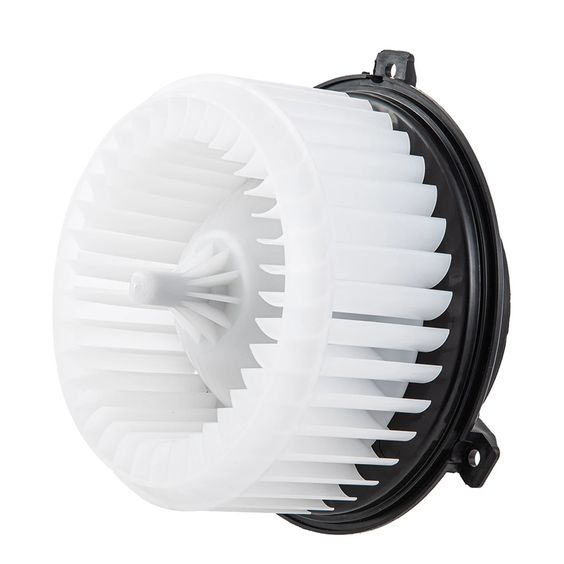
What Is a Blower Motor?
The blower motor is a key component in your vehicle’s HVAC system. It forces air through the system, blowing it over the heater core for warm air or over the A/C evaporator for cool air. By controlling the blower motor’s speed via the A/C controls, you adjust the airflow in the cabin.
In older vehicles, blower motor speed is regulated by a switch and resistor assembly, while newer models typically use an electronic control module that communicates with the HVAC control unit.
If your HVAC system isn’t blowing air or the airflow is weak, the blower motor could be the culprit. In some cases, faulty relays or heater controls may also cause issues, so it’s best to consult a professional mechanic for a proper diagnosis and repair.
Blower Motor Replacement: Step-by-Step Process
If a faulty blower motor is diagnosed, here’s how a qualified mechanic will go about replacing it:
2.1. Tools & Parts Required
A professional mechanic will have all the necessary tools to tackle this job. This includes various screwdrivers, ratchets, sockets, and sometimes specialized tools to disconnect clips and connectors. While the blower motor itself is the primary replacement part, you might also want to ask your mechanic to replace the cabin air filter while they’re in there, as it’s often easier to access during blower motor replacement.
2.2. Locating the Blower Motor
A skilled technician will know exactly where to find the blower motor in your vehicle. Typically, it’s located in the passenger-side footwell area, though older vehicles may have the blower motor positioned in the engine bay, near the firewall on the passenger side. If in doubt, the exact location can usually be found in the vehicle’s repair manual.
2.3. Preparing the Vehicle
Before diving into the repair, the mechanic will prepare the vehicle. They’ll park it on a flat, stable surface and engage the parking brake. The negative terminal of the battery will be disconnected to prevent any electrical issues during the repair. Floor mats, trim panels, or covers that block access to the blower motor will be removed with care, ensuring no damage is done to clips or plastic fasteners.
2.4. Removing the Old Blower Motor
Once access is cleared, the mechanic will remove the blower motor. Depending on the vehicle, there may be 3 to 6 bolts securing the motor to its bracket. After unscrewing these, the blower motor assembly is carefully removed. The HVAC vent connections and electrical power connector will also be detached, sometimes requiring gentle prying with a flathead screwdriver.
It’s important for the mechanic to handle the motor with care, especially if there’s a plastic wheel attached. This component can become brittle over time, and any broken pieces could end up lodged in the footwell, creating further complications.
2.5. Installing the New Blower Motor
When installing the new blower motor, the technician will ensure it’s properly oriented—matching the position of the old motor. If any gaskets or seals are damaged, they’ll be replaced as well. The power connector will be plugged in, and the HVAC vent connections will be reattached. The new motor is then slid into the bracket and securely bolted back into place.
2.6. Reassembling the Vehicle
With the new blower motor installed, the mechanic will carefully reassemble any components that were removed, such as the glove box or lower trim panels. The battery will be reconnected, and the HVAC system will be tested to ensure the new motor is functioning properly. The technician will verify that the blower motor responds to different speed settings and that airflow is consistent.
Conclusion:
Changing a blower motor isn’t a simple task and requires specialized tools and knowledge to ensure proper installation and function. While a professional mechanic handles all the technical aspects, it helps to understand the basic process so you can stay informed about the progress of the repair. By keeping yourself in the loop, you’ll ensure that the job is done right and that your HVAC system is working at full capacity once again.