Repair instructions
What Is a Radiator Cap? Functions, Symptoms, Replacement, and More
The radiator cap might seem like a small, simple part, but it plays a vital role in your car’s cooling system. Without it, your engine would be at a much higher risk of overheating, which can cause serious damage. So, let’s dive into the function of the radiator cap, how to spot signs of trouble, and how to replace it when needed.
What Is a Radiator Cap?
The radiator cap is part of your car’s cooling system, designed to maintain proper pressure within the radiator. It helps regulate the flow of coolant, ensuring that your engine doesn’t overheat and is running at an optimal temperature.
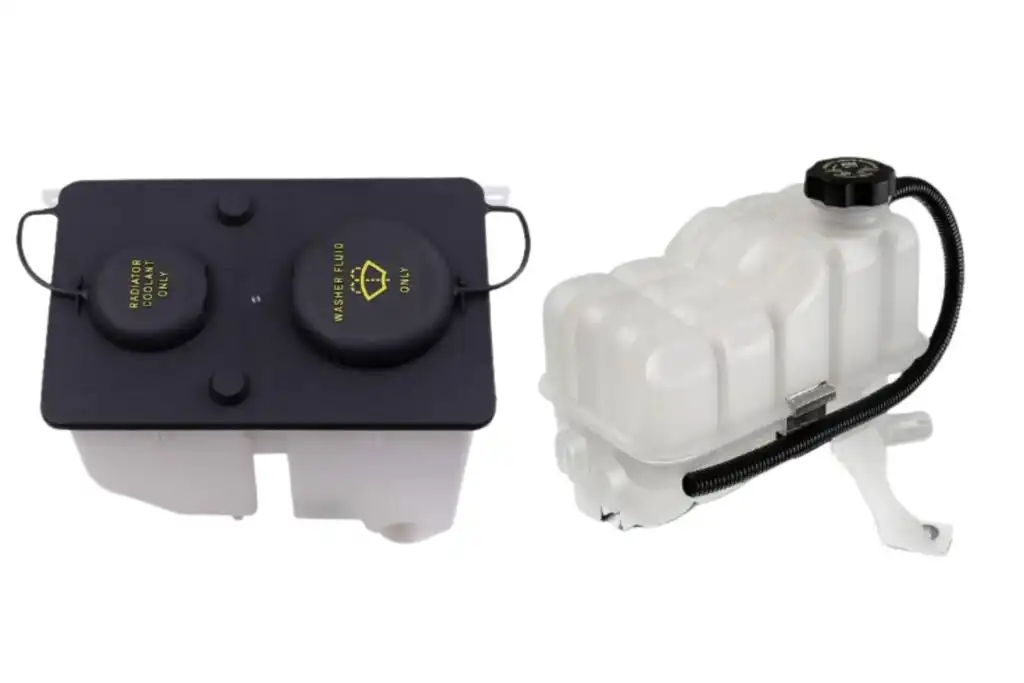
In modern vehicles, some cooling systems use a degas tank or surge tank instead of a traditional radiator cap on the radiator itself. These systems typically feature a pressure-capable degas tank and a screw-on cap, with the cooling system’s fill point located at the surge tank. Older cars, however, will often have the cap directly on the radiator.
The cap’s primary job is to maintain pressure in the system, preventing the coolant from boiling and ensuring that the engine runs efficiently.
How Does a Radiator Cap Work?
Most radiator caps have a spring-loaded valve that holds the system at a set pressure. Typically, this pressure is calibrated to 12-15 PSI (pounds per square inch), though lower-pressure caps (around 7 PSI) are also available for certain models.
Here’s how it works: As the coolant heats up, it expands. This increased pressure pushes against the cap, compressing the spring. Once the pressure exceeds the cap’s threshold, the spring opens the valve, allowing coolant to flow into the degas tank. When the engine cools down, the coolant contracts, creating a vacuum that draws coolant back into the radiator, preventing air from entering the system and ensuring everything stays sealed.
The pressure inside the system raises the boiling point of the coolant. At sea level, water boils at 212°F, but with a 15 PSI cap, the coolant can safely reach temperatures of 257°F—well above the normal operating range for most engines.
What Happens if the Radiator Cap Fails?
If the radiator cap isn’t functioning correctly, you could run into several problems:
- Overheating: Without the proper pressure, the coolant could boil at lower temperatures, leading to engine overheating.
- Coolant Leaks: A damaged cap can cause excess pressure to build up, forcing coolant to leak from hoses or the water pump seal.
- Air in the Cooling System: A faulty cap can let air into the system, causing air pockets that reduce the efficiency of the cooling system.
- Collapsed Radiator Hose: If the valve inside the cap fails to open and close properly, the pressure drop when the engine shuts off can cause the radiator hose to collapse.
How to Tell If Your Radiator Cap Is Bad:
Common signs that your radiator cap might be failing include:
- Steam or coolant dripping from under the hood: This could be a sign of a leaking cap or hose.
- Overheating engine: If the cooling system can’t maintain pressure, the engine may overheat.
- Coolant leaks: If the cap doesn’t seal properly, coolant can escape and cause low coolant levels.
- Air pockets in the system: You might hear gurgling sounds or notice inconsistent temperature readings from your gauge.
- Collapsed radiator hose: A hose may collapse if the cap isn’t maintaining proper pressure.
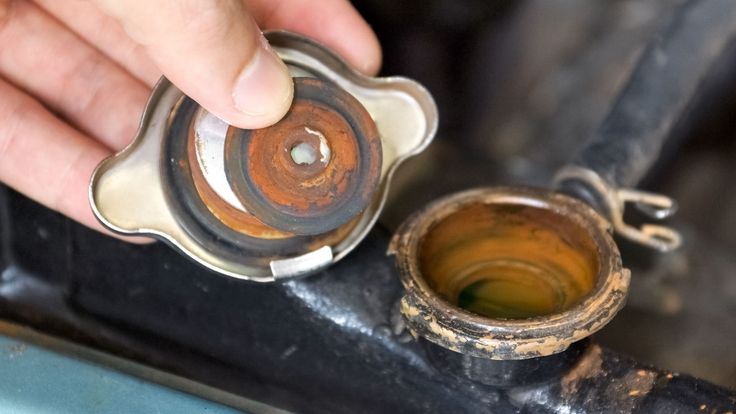
- Cracked seals or a damaged valve: Inspect the rubber seal and brass valve for any visible damage. If you notice cracks or excessive wear, it’s time for a replacement.
How to Remove and Replace a Radiator Cap:
If you’re comfortable working on your car, replacing the radiator cap is a simple and inexpensive repair. Here’s how to do it:
- Cool the Engine: Let the car sit for about 30 minutes to ensure the engine and radiator are cool. Never attempt to remove the cap from a hot engine—doing so could cause serious injury.
- Locate the Radiator Cap: Typically, the radiator cap is at the front of the engine compartment, behind the grille. If your car has a degas tank, you may need to locate that instead.
- Remove the Cap: If it’s a screw-on type, push down on the cap and turn it counterclockwise. Some caps may have a twist-lock mechanism—make sure to check your vehicle’s manual for specifics.
- Inspect the Cap: Look for cracks in the rubber seal or visible damage to the spring-loaded valve. If it’s worn or damaged, replace it with a new cap that matches the original pressure rating (usually stamped on the cap itself).
- Install the New Cap: Place the new cap on the filler neck and twist it clockwise until it’s securely seated.
If you’re not comfortable doing this yourself, a mechanic can replace the cap for you. It’s a quick fix that should cost between $10 and $50, depending on your car model. In many cases, labor charges won’t apply because it’s such a straightforward job.
How Often Should You Replace the Radiator Cap?
The radiator cap should be replaced every 4 to 5 years, even if it doesn’t show obvious signs of wear. Over time, the seals and springs inside the cap degrade, which can lead to inefficiencies in the cooling system. If you neglect the cap, it can lead to overheating or more costly damage to other components in the cooling system.
Your car’s radiator cap might be small, but it plays a crucial role in preventing engine damage. By understanding how it works and recognizing the symptoms of a faulty cap, you can avoid expensive repairs and keep your engine running at the right temperature. If you suspect your radiator cap is failing, it’s best to address it sooner rather than later—before it leads to bigger issues.