Repair instructions
What’s the Best Way to Remove a Car Clear Coat?
Summary:
When your car’s clear coat starts showing signs of wear, it’s time to replace it. If it’s not deeply damaged, you’ll need to properly remove the old clear coat before applying a fresh layer. This process requires a few essential tools and steps. You’ll need a buffing compound, sandpapers with varying grit grades, car wax, an electric polisher, 100% wool buffing pads, and a spray detailer. The best way to remove the clear coat involves a series of steps, including washing, sanding, buffing, and finishing.
A clear coat serves as your vehicle’s protective layer, guarding against environmental damage and minor abrasions. However, exposure to the elements, small debris, and everyday wear and tear will eventually cause the clear coat to degrade. If you notice peeling, cracking, or fading, it’s time to replace it. Here’s how you can remove the damaged clear coat and get your car looking fresh again.
Can You Apply a New Clear Coat Over the Old One?
In some cases, you can apply a fresh clear coat over an existing one. However, if the old clear coat is cracked or severely worn, it’s best to remove it before applying a new layer. A compromised base layer won’t provide adequate protection for the new coat.
Tools and Equipment for Clear Coat Removal
Removing a car’s clear coat requires precision and the right tools. Here’s what you’ll need for the job:
- Buffing compound or a specialized clear coat remover
- Sandpapers with various grits: 400, 800, 1000, and 1200
- Car wax for protection
- Electric polisher for smooth and consistent polishing
- 100% wool buffing pads
- Spray detailer to finish and clean
Step-by-Step Process for Removing a Car’s Clear Coat
Removing the clear coat is a multi-step process. Here’s a detailed guide on how to tackle the job professionally.
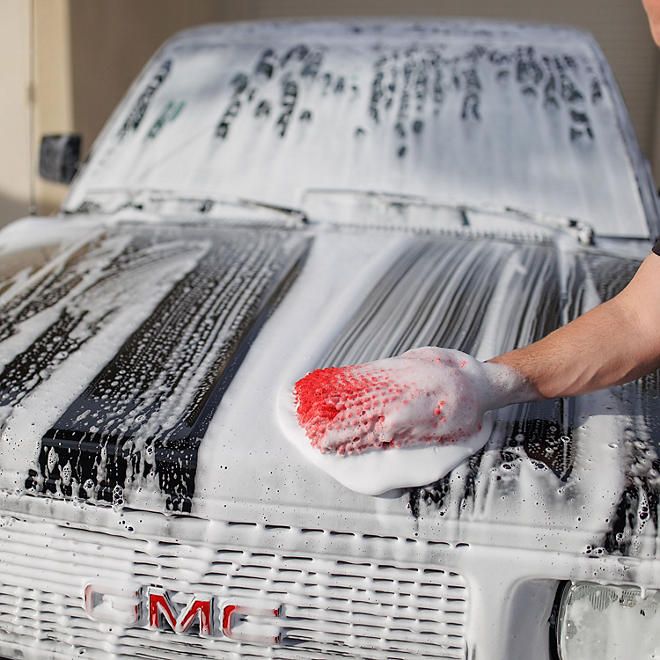
1. Washing Your Vehicle
Start by thoroughly washing your car. A clean surface makes it easier to remove the clear coat and ensures that the new clear coat goes on without contaminants. Use a soft cloth or sponge to apply car wash soap and remove dirt and grime. Rinse the vehicle with clean water, and dry it with a soft towel. Let the car air-dry in a well-ventilated area.
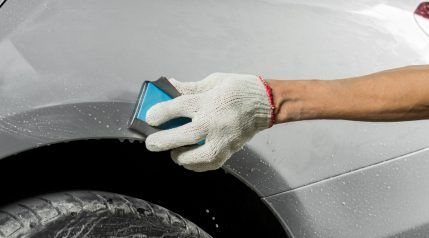
2. Wet Sanding with Low-Grit Paper (400 Grit)
Now it’s time to start the sanding process. Soak the 400-grit sandpaper in water for at least five minutes before using it on the clear coat. Begin sanding carefully, staying about an inch away from any areas that show damage, like cracks or peeling. Wet sanding weakens the clear coat, making it easier to remove, while smoothing out any rough patches.
3. Wet Sanding with High-Grit Paper (800-1200 Grit)
Once you’ve sanded with the 400-grit, move to progressively finer grits: 800, 1000, and then 1200. This will help smooth the surface and prepare it for the new clear coat. Keep sanding just beyond the areas you’ve already worked on. The surface should feel smooth to the touch; if it doesn’t, continue sanding lightly.
4. Protecting Sensitive Areas
Cover fragile parts of the vehicle, such as headlights, mirrors, and trim, with painter’s tape to avoid damage during the sanding and polishing process.
5. Dry Sanding
Once the vehicle is dry, begin dry sanding with 600 or 800-grit sandpaper. Focus on smoothing out any remaining rough patches and working gently around any cracks. Sanding at a 45-degree angle can help avoid causing additional damage to the surrounding areas.
6. Rinsing and Drying the Vehicle
Rinse the vehicle again to wash away any dust or debris left from the sanding process. Inspect the water for a milky appearance, which indicates that the clear coat is being successfully removed. Dry the car completely with a clean towel.
7. Finishing with Grit Paper
Once dry, go over the surfaces again with fine-grit sandpaper (1000 or 1200). This helps smooth out any small bumps and gives the surface an even finish, preparing it for polishing.
8. Buffing the Surface
Now, it’s time to buff. Apply a layer of car polish and use an electric polisher set at 1,200 to 1,400 revolutions per minute (RPM). If doing this by hand, use a 100% wool pad. Move the polisher in circular motions, ensuring even coverage. This will remove any swirl marks and imperfections from the sanding process.
9. Applying Buffing Compound
Once the surface is polished, apply a buffing compound or a clear coat remover. Test it on a small, inconspicuous area to ensure it doesn’t damage the paint. Apply the compound with a wool pad or the electric polisher, moving in circular motions. Use a higher setting on the polisher for faster results.
10. Final Touches
After applying the buffing compound, wipe down the surface with a clean microfiber towel. Apply a quick detailer to the polished areas for an added layer of shine. To finish, apply car wax to protect the new clear coat and enhance the shine.
Fixing Minor Blemishes on the Clear Coat
If you’re dealing with smaller imperfections or blemishes on the clear coat, you don’t necessarily have to remove the entire layer. To fix these:
- Use a degreaser to remove any wax from the affected area.
- Apply painter’s tape around the damaged area, keeping it about an inch away from the edge of the original clear coat.
- Lightly sand the damaged section with 800-grit sandpaper.
- Spray a thin layer of new clear coat over the sanded area, allowing it to dry before adding more coats as needed to level out the surface.
Following these steps carefully will ensure that your car looks as good as new and is protected for years to come. Be sure to take your time during each step for a professional-quality finish.