Repair instructions
When Should You Replace Your Vehicle’s Weatherstripping?
Overview
As a car repair professional, it’s essential to understand that weatherstripping typically lasts between 5 to 10 years. Once your vehicle hits this age range, it’s crucial to inspect the weatherstripping regularly for any signs of wear—such as cracks, tears, or breaks in the rubber.
Weatherstripping is made of rubber, which naturally degrades over time. It can become brittle and lose its ability to form a proper seal. When this occurs, you might notice increased road noise and potential water leaks, compromising your driving comfort and the integrity of your vehicle’s interior.
Key Points to Consider:
- Lifespan of Weatherstripping
- Causes of Weatherstripping Wear
- Importance of Replacement
- Replacement Tips
Lifespan of Weatherstripping
Expect your weatherstripping to last about 5 to 10 years. Beyond this point, inspect it for cracks or detachment. Even if there are no visible issues, the seal might still be compromised, allowing noise and moisture into the cabin. If you notice these symptoms, it’s time for a replacement.
Causes of Weatherstripping Wear
Weatherstripping wear is often a result of repeated door openings and exposure to temperature fluctuations and moisture. Over time, rubber can become brittle and lose its elasticity. Adhesive degradation is also common, leading to loose or detached strips.
Pro Tip: Most vehicles experience minimal weatherstripping issues unless subjected to heavy loads or damage from tools used to unlock doors.
Importance of Replacement
Worn weatherstripping leads to several annoying problems:
- Increased cabin noise.
- Water leaks that can damage upholstery and promote mold growth.
- Inefficiency in your HVAC system due to outside air infiltrating the cabin.
Addressing these issues promptly can save you from more extensive repairs down the line.
Replacement Tips
Ready to tackle weatherstripping replacement? Follow these professional tips:
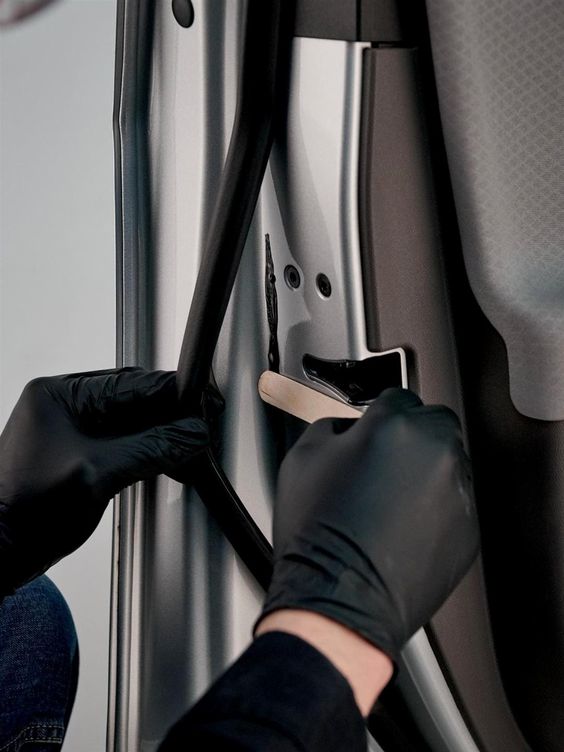
1. Gather Your Tools
- Screwdriver: To remove old weatherstripping.
- Heat Gun: For stubborn adhesive remnants.
- Utility Knife or Shears: To cut the new weatherstripping to size.
- Weatherstripping Adhesive: For reseating as needed.
2. Remove Old Adhesive
Use a degreaser or a diluted soap solution to soften any sticky adhesive, making removal easier.
3. Measure and Cut
Precision is key. Measure the required length of the new weatherstripping carefully—measure twice before cutting. Use the old strip as a reference to ensure you get it right the first time.
4. Secure the New Weatherstripping
Align the new weatherstripping in its designated track, pressing it into place gently. Ensure it fits correctly before applying firm pressure. Allow any adhesive to cure fully before closing doors or windows to maintain a proper seal.
Replacing your vehicle’s weatherstripping can be a straightforward DIY task with the right tools and a little patience. However, if you’re unsure or prefer professional assistance, don’t hesitate to reach out to a car repair expert. Your comfort and safety on the road are paramount!